Jewelry Manufacturing | Design to Production
Working with a trusted jewelry manufacturer is crucial for businesses aiming to ensure the quality and integrity of your products. HarperCrown not only adheres to the highest standards of craftsmanship but also ensures that ethical sourcing and sustainable practices are a priority. According to a survey conducted by the Jewelry Consumer Opinion Council, over 85% of consumers stated that the quality and trustworthiness of their jewelry are significantly influenced by the reputation of the manufacturer. Our partnership will fosters trust with you and your consumers.
Having the idea to create your own jewelry is a huge milestone so we want to congratulate you on moving to the next step. Being in the jewelry industry for over a decade we understand that creating your own jewelry can be both exciting and fulfilling. So we want to thank you for coming to us. Let's get started!
The entire jewelry manufacturing process can be broken down to the following steps.
Phase 1
Design Phase. This is when we get all the information to make your jewelry. We ask for sketches or photos of your design. We also need dimensions such as height x width x length. Once the design is done we will send a render for approval. If a revision is required, we will make the necessary changes and re-send for approval.
Phase 2
Casting Phase. This is when we begin casting your jewelry. We offer manufacturing in sterling silver, brass, and solid gold. This is the production phase where we shoot the wax, create the tree, cast, snip, polish, clean and quality check.
Phase 3
Plating Phase. This is an optional phase where you can choose your plating. We offer several options such as gold and rhodium plating. We can finish in yellow, rose, black, and matte as well.
CAD DESIGN & 3D PRINT
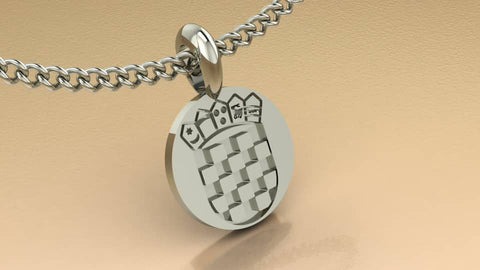
During your consultation with our Customer Service team we will ask several questions and ask for a drawing of your design. We will cover all aspects of your design from material, measurements, quantity, and any finish requirements. Once we have all the pertinent information we will begin the CAD design process. Our engineers will design your item and print a 3D master. We will then send a photo of the master for your approval. Once we have your approval we can move on to the casting process.
If you already have a CAD or 3D print that's great! We can head directly to the casting process.
JEWELRY CASTING
What is casting? Jewelry casting is the process of making jewelry that has been long used for thousands of years. With improvements in technology and the advent of superb tools and machinery, jewelry casting is an art that is more dynamic today than ever. Whether you want custom-made piece of jewelry or have to make a bulk order of similar types of jewelry, casting is a process that can help you achieve both.
Also called wax casting, jewelry casting uses a wax pattern that is made into a jewelry mold for being filled with molten silver or metal to create an intricate piece of jewelry.
The process involve great temperatures and even greater precision for excellent results. Jewelry casting is a process that has allowed designers and jewelry makers to bring their ideas to life and produce gorgeous pieces of jewelry. There are 4 steps to the basic process of jewelry casting.
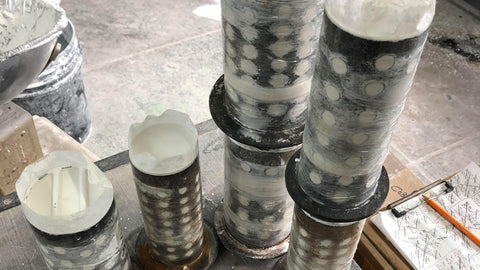
CREATING THE MOLD
Once we have a 3D print or a wax pattern we can create a mold. There are several ways of creating a mold but the most common are rubber and metal molds. The mold will ensure the intricacies of your design are kept throughout the casting process.
CREATING THE TREE & THE INVESTMENT PROCESS
Once we have the mold we will "shoot" wax into the mold and attach to a tree which will placed into an investment. Once the investment material has settled, the flask will be then placed into a burning kiln which helps burn away the wax leaving behind a cavity that works as the final mold for the jewelry piece. The wax melts out through a couple of “sprues” that are attached to the bottom of the mold before placing it in the kiln. The number of sprues depend on the size of the piece of jewelry. This is also called the burn out cycle in which wax models are connected to each other using a sprue forming a tree-like formation. This formation is then put into a metal flask which is filled with a slurry of plaster. The flask is then “debubblized” to get rid of any air bubbles or air pockets in the mold. Once the wax has melted away and the mold has been invested leaving behind no remaining wax residue and only a hollow impression to serve as a mold for jewelry, it is time to pour in the metal of your choice.
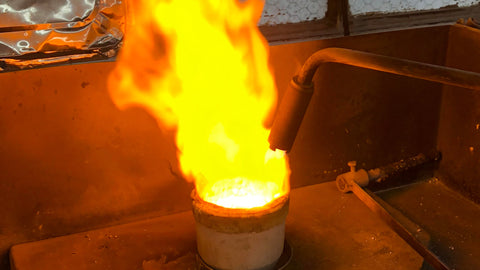
CASTING
Using a proper jeweler’s centrifuge, the melted metal is poured into the mold being evenly distributed. The centrifuge helps create the inertia which is necessary for molding. After the burning out process, a swing arm with a cradle carries the flask in direct alignment with a container which will be used for holding the poured material. While the arm is in a crooked position, the container will be heated to melt the metal, the temperatures and the method used depend on the technicality of the equipment and the type of metal. Once the metal is at the desired temperature, the centrifuge is released, slinging the metal at high a speed from the container to fill the flack before it comes to rest.
Another method to cast jewelry very similar to centrifuge casting is vacuum casting. Melted material is poured with enough force into a flask for it to funnel through minute, intricate, cavities before it cools. It is also possible to cast jewelry without a centrifuge by simply pouring the melted material into the mold using a metal-specific syringe as a pump. Once the metal has been poured, it is allowed to cool down for a few minutes before being dunked into cold water to retain its final shape. The amount of time required for the cooling process depends on the type of metal that is being used and its melting point.

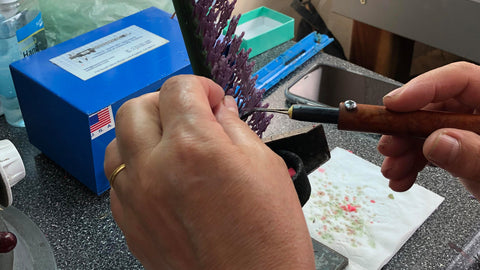
BUFF & POLISH
Next, the jewelry is given its final look by using a buffing wheel to give the piece a shiny, complete finish. Buffing machines, enamel clothes, polishes and filers can be used to the give the final piece the desired shape and style. If the piece has stones this is when they will be set.
PLATING
The jewelry is submerged into a vat of chemicals to plate with gold. We offer several different color finishes: yellow, rose, silver, and black rhodium. Our plating is nickel free which avoids any allergic reactions.
QUALITY INSPECTION
All of our products are hand inspected for any imperfections. This is to ensure we give our customers our best work. Once the pieces pass our inspection the pieces are ready to ship.
COMMON QUESTIONS & ANSWERS
Will you help me design my pieces?
Yes, that's why we're here. We can offer advice and expertise on how to design your jewelry to ensure the structural integrity of your pieces.
Do you have an MOQ or minimum pieces per design?
We ask for an MOQ of 100 pcs per design. However, we are open to accommodate your needs. Please feel free to contact us.
How much does the process cost?
The cost depends on a few factors such as the intricacy of the jewelry, size, weight, and material.
How long will the process take?
3-4 weeks from the design phase to production.
Where is the jewelry manufactured?
We're located in the Jewelry District of Los Angeles, CA.
What kind of jewelry can you make?
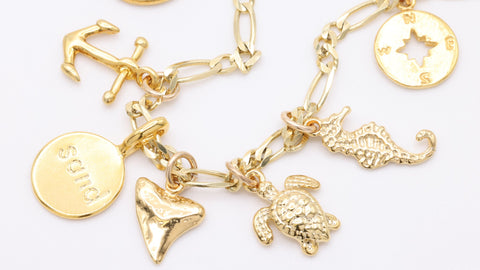
We can manufacture charms, finished jewelry, and any other designs.
Will you sell my designs?
No. Your designs are your own property and we will never infringe upon that.
What if I need to order more pieces after my first order?
Once we have done the first production run, we will have the molds ready to use for as many orders you need in the future.
Can I keep the molds?
Yes, if you would like to keep the molds we can mail them to you.
LET'S GET STARTED
Let's grow your jewelry business. Contact us anytime and one of our specialists will get back to you soon.
